Handling Elastic Network Interface(s) (ENIs) in AWS
Shows how we can map single EC2 instances to multiple Network Interfaces via Multiple Elastic IPs.
This is an introductory blog on how AWS ENI behaves with EC2 instances. If you’ve just started studying AWS, you may not use this feature straightaway. Instead, it can be used in multiple other technical use cases. However, it is always good to understand the real concept behind ENIs rather than knowing it conceptually.
ENIs can be useful in the following key scenarios [1].
- Creating a Management Network
- Use Network and Security Appliances in your VPC
- Create dual-homed instances with workloads/roles on distinct subnets
- Create a low-budget, high availability solution
Elastic Network Interface (ENI)
ENI is a logical networking component in a VPC that represents a Virtual Network Card. It can have the following attributes.
- A primary private IPv4 address
- One or more secondary private IPv4 addresses
- One Elastic IP Address (IPv4) per private IPv4 address
- One public IPv4 address
- One or more IPv6 addresses
- One or more security groups
- A MAC address
- A source/destination check flag
Some of the key features of ENIs are as follows:
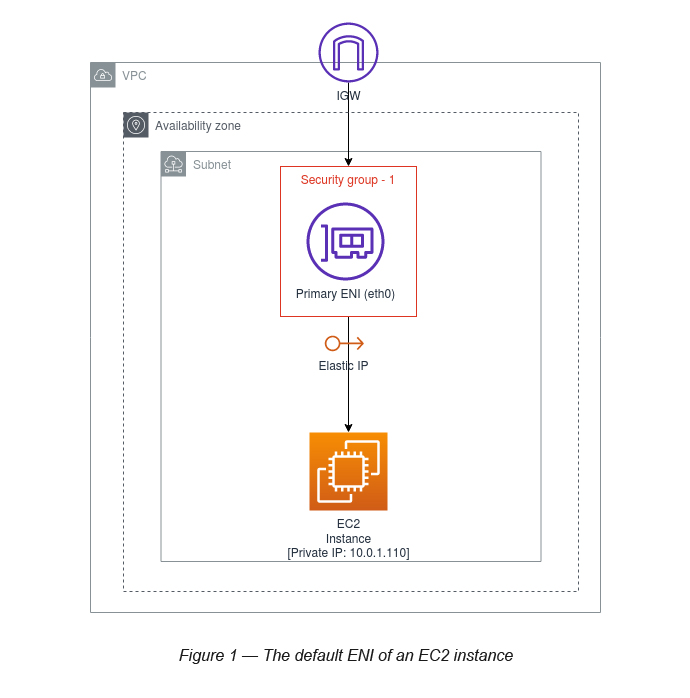
- Each instance in your VPC has a default network interface (the primary network interface — eth0) that is assigned a private IPv4 address from the IPv4 address range of your VPC (see Figure 1).
- You cannot detach the default (primary) network interface from an instance.
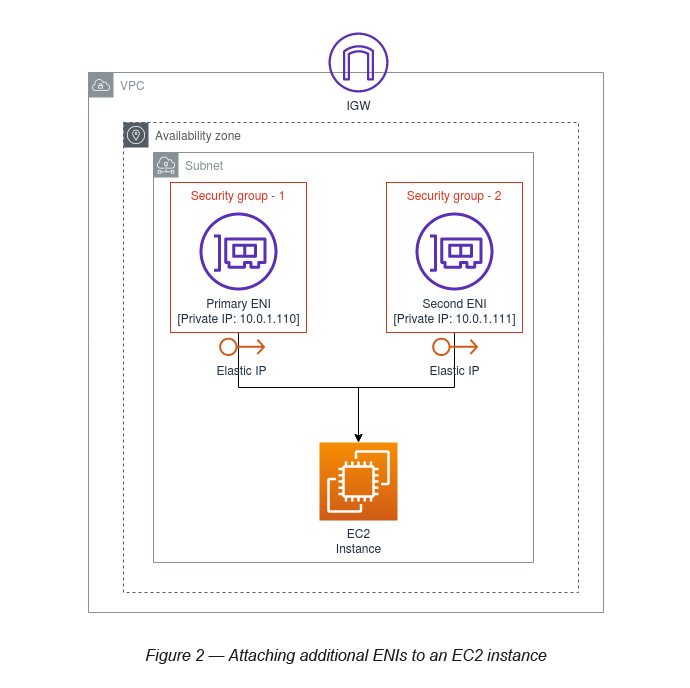
- You can create and attach an additional network interface to an instance in your VPC (see Figure 2).
- The number of network instances you can attach varies by instance type.
- You can create a network interface, attach it to an instance, detach it from an instance and attach it to another instance. A network interface’s attributes follow it as it is attached or detached from an instance and reattached to another instance. When you move a network interface from one instance to another, network traffic is redirected to the new instance.
The Scope
In this blog, we will be primarily focusing on how to create multiple ENIs for a single EC2 instance and attach multiple Elastic IPs for each ENI private IP. Using this approach, you can create multiple routes to the same instance application installations.
We will discuss how we attach and detach ENIs to and from EC2 instances in a later blog.
Task 1: Create an EC2 instance and install Apache
Create an EC2 instance (Amazon Linux, t2.micro) and install Apache on it.
While creating the instance, create a Security Group (my-sg-1) and open port 80(HTTP) for future testing.
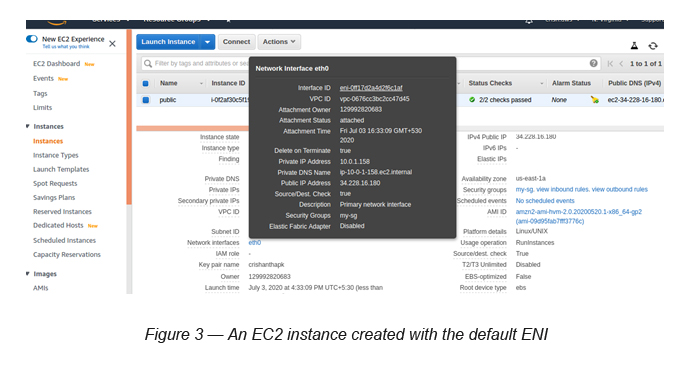
When you create an EC2 instance it attaches a default network interface (primary ENI — eth0) to it (see Figure 3).
Task 2: Allocate an Elastic IP
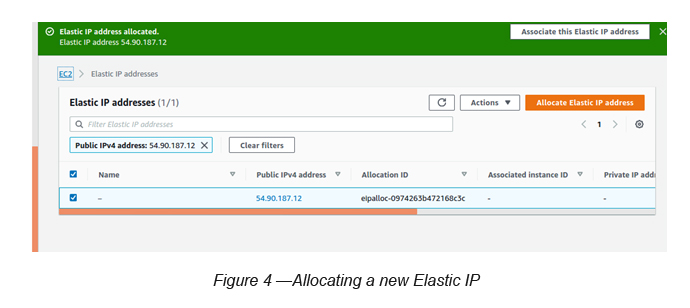
Now let’s allocate a new Elastic IP to the primary ENI (If your subnet is public and is configured to have auto generated public IP(s) then this is not needed. But, here we are going to showcase how Elastic IP(s) can be allocated to ENIs).
Go to Elastic IP(s) → Click “Allocate Elastic IP Address” → Select Amazon Pool of IPv4 addresses → Click Allocate (see Figure 4)
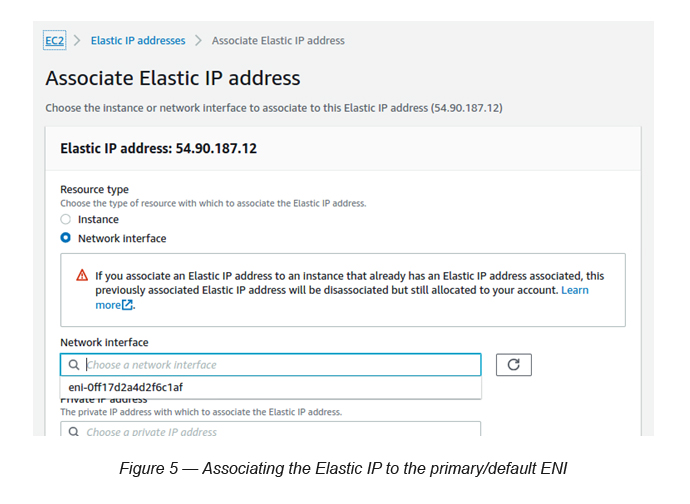
Task 3: Associate the created Elastic IP to the primary/default ENI
Go to Elastic IP Addresses → Click the Actions button and select Associate Elastic IP → Select Network Interface as the Resource Type → Select the Primary Network Interface that you’ve created from the Network Interface search box → Click Associate.
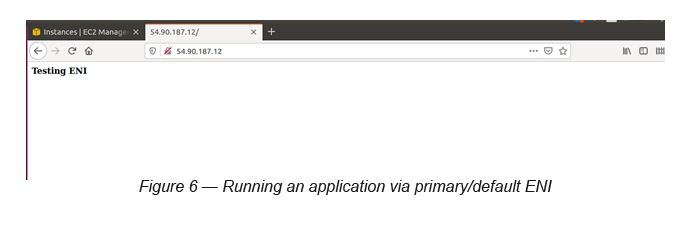
Task 4: Run the EC2 instance Apache installation using the Elastic IP via the primary/default ENI
Let’s try to run the instance now with the assigned Elastic IP. You should see something similar to this. Here, the index.html has a dummy text “Testing ENI” (see Figure 6).
Now, let’s try to create another ENI and attach an Elastic IP with a new Security Group attached to it. This allows us to navigate the same instance via a different network address (new Elastic IP).
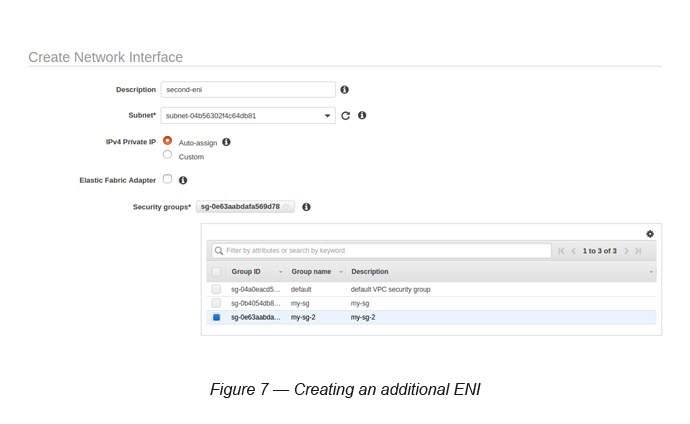
Task 5: Create the additional ENI (second ENI)
As a prerequisite, create another Security Group (my-sg-2) without allowing any ports to it.
Now, create the additional ENI.
Go to Network Interfaces → Click Create Network Interface → Select the same subnet with which you created the EC2 instance → Select Auto Assign for the IPv4 Private IP → Select the Security Group (my-sg-2) → Create ENI (see Figure 7).
Task 6: Create another Elastic IP
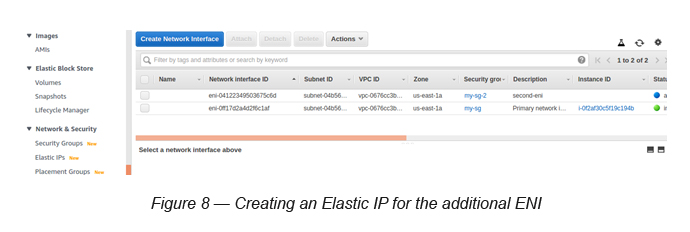
Task 7: Associate the Elastic IP (created under step 6) to the additional ENI
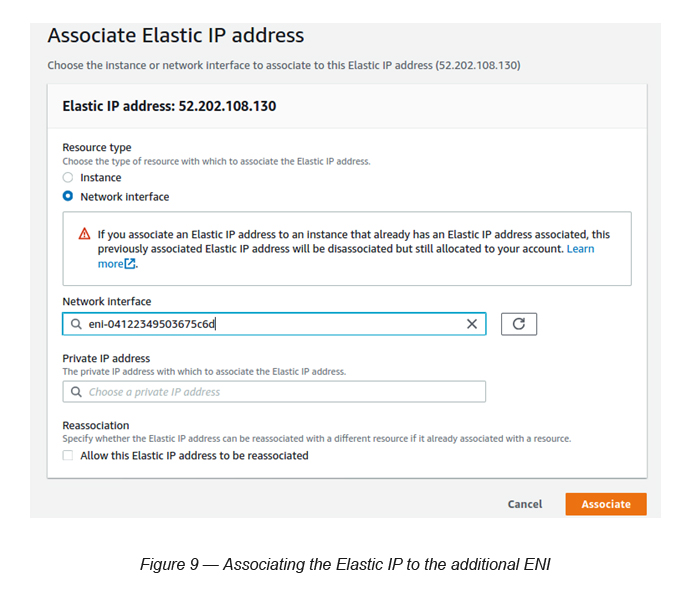
Task 8: Attach the additional ENI to the EC2 instance
In order to attach this additional ENI to the EC2 instance, you are first required to do the following configuration.
Go to EC2 instances → Select the EC2 instance → Select Actions → Select Networking → Select Attach Network Interface and select the second ENI you’ve created.
The Conclusion
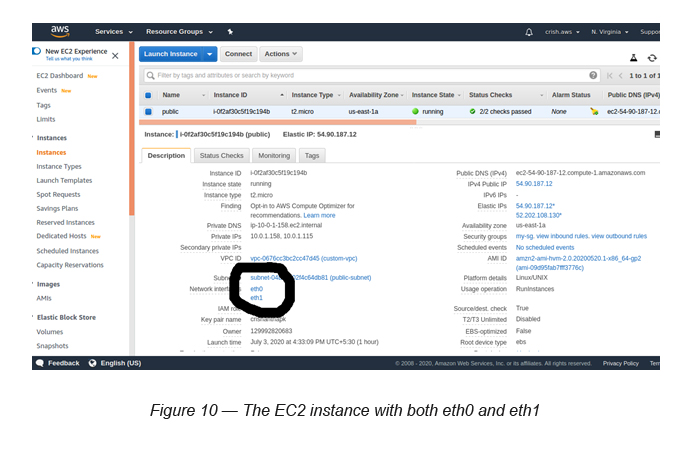
Finally, as a result of the above exercise, the EC2 instance is now attached to the two ENIs.
- Default/Primary ENI (eth0)
- Additional ENI (eth1)
Now you should be able to see something similar to the following screen.
References
- Elastic Network Interfaces: https://docs.aws.amazon.com/AWSEC2/latest/UserGuide/using-eni.html

Crishantha Nanayakkara
Vice President - TechnologyDeveloping a Custom Audit Trail and a Notification Service for a Workflow Based Serverless Application on AWS
READ ARTICLE
Human Emotions Recognition through Facial Expressions and Sentiment Analysis for Emotionally Aware Deep Learning Models
READ ARTICLE