AWS Cross-Account Access
Using IAM Role Switching
Introduction
AWS Cross-Account Access is all about its ability to access resources of one AWS account from another.
This is possible using a feature called Role Switching. Role Switching can happen between AWS Accounts within an AWS organization or between AWS organizations.
However, in this blog, we limit our discussion to role switching between AWS accounts within a single AWS organization.
The following diagram explains these scenarios from a high level (see Figure 01).
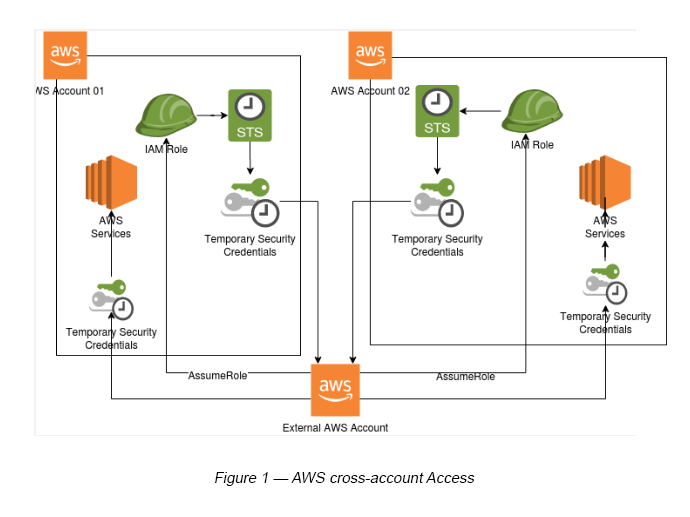
Let’s discuss these steps in bit more detail now.
AWS Organizations
Before we get into the nitty gritties of AWS cross-account access, let’s first discuss AWS organizations and its hierarchy (see Figure 02).
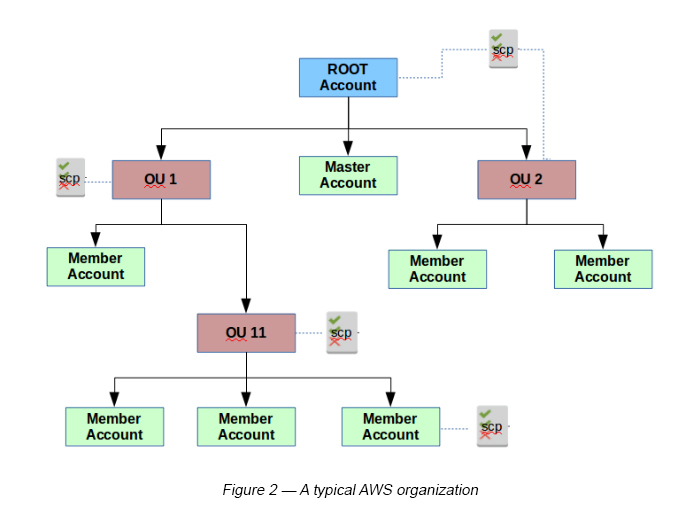
AWS organizations help you centrally govern your environment as you grow your workloadsd on AWS. As explained, it helps you to manage multiple AWS accounts within a single business. Instead of managing many accounts with many isolated sets of logins and individual bills, this allows you to have a more consolidated setup with better performance.
In a typical AWS organization, you will find an account hierarchy, some logical units and a service policy to govern each of its accounts.
Master Account: When you create an AWS Organization under the ROOT account, you basically create the Master Account. The Master Account cannot be restricted. The consolidated billing and centralized logging happens here.
Member Account: This is basically an AWS account which is created under the ROOT account, which is not a Master Account.
Organizational Unit (OU): These are groups that can be created and have AWS accounts assigned to them. These are useful when you want to assign certain Service Control Policies (SCPs) to all accounts under the OU.
Service Control Policies (SCPs): These are a type of organizational policies that you can use to manage permissions in your organization. SCPs, by default, offer central control over the maximum available permissions for all accounts in your organization. Once a Member Account is created, a default IAM Role is created named OrganizationAccountAccessRole. By default, this role has full Admin Access privileges (FullAdminAccess).
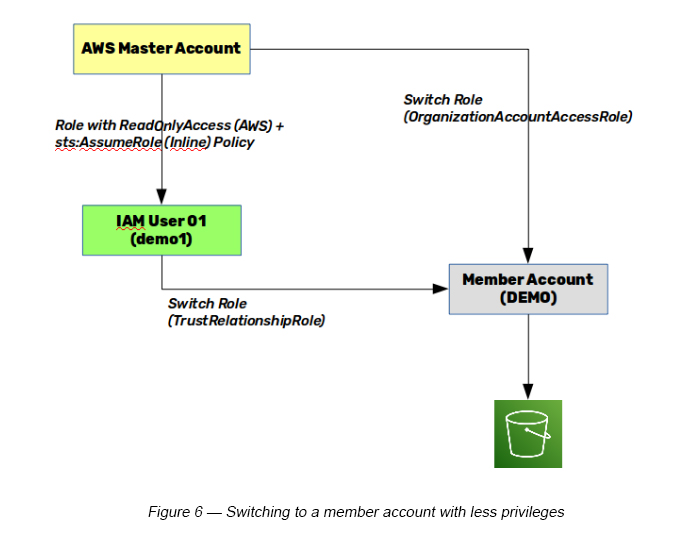
In this blog, switching accounts will be explained in two scenarios.
- Scenario 01 — Switching to a Member Account from the Master Account within the same AWS organization with Full Admin Access using OrganizationAccountAccessRole
- Scenario 02 — Switching to a Member Account from the Master Account IAM user within the same AWS organization with a customized IAM Role
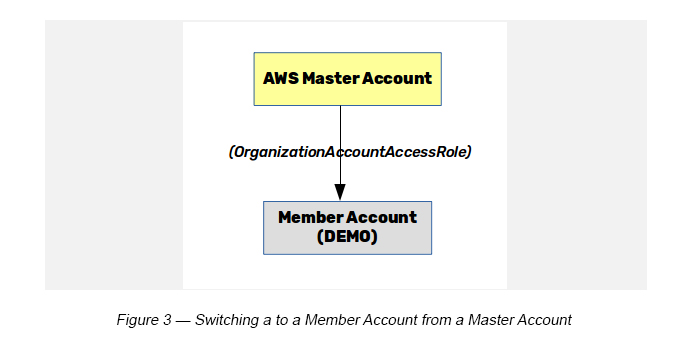
Scenario 01 — Switching with Full Admin Access IAM Role
As explained, by default you can switch to a member account from the master account with Full Admin Access. Here, you need to use a static Role Name called OrganizationAccountAccessRole (see Figure 3).
Step 1 — Create an AWS organization (if your AWS account does not have it already). This step will create the Master Account for your AWS account.
Step 2 — Create a Member AWS account within your AWS organization.
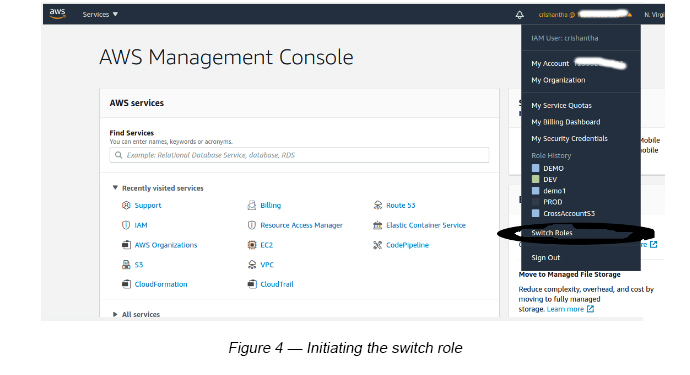
Step 3 — Sign in to the AWS Console as an admin user (you cannot do Role switching with a ROOT account) and do a role switch to the member account you created in step 2.
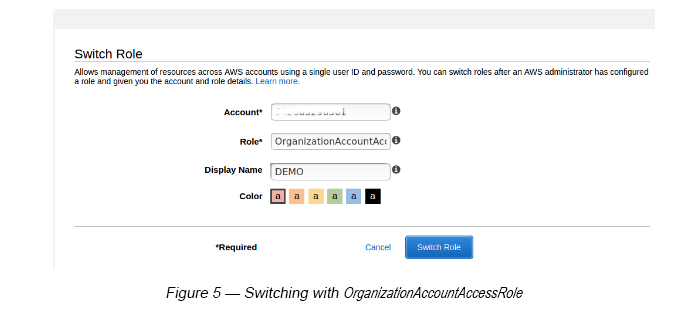
If all works well, the switch to a Member Account should have taken place as shown in Figure 5. You can find the member account ID on the AWS organization dashboard. If you browse through the member account, you can see that you have been granted admin access privileges. If you want to provide less privileges, you can adjust the Service Control Policy for the respective member account.
Scenario 02 — Switching with less privileges
Step 1 — Sign in as the Admin user and create an IAM user (e.g. demo1).
Step 2 — Create an IAM Group with the following policies attached to it.
- AWS Managed Policy — Add ReadOnlyAccess
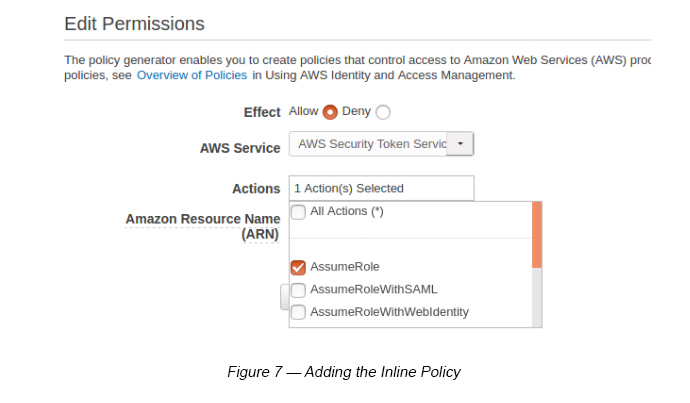
- Inline Policy — (Service: STS, Actions: AssumeRole, Resources: *)
Click “Inline Policy” and use the Policy Editor to add STS Assume Role.
Once both policies have been added you will be able to see the following screen (see Figure 8).

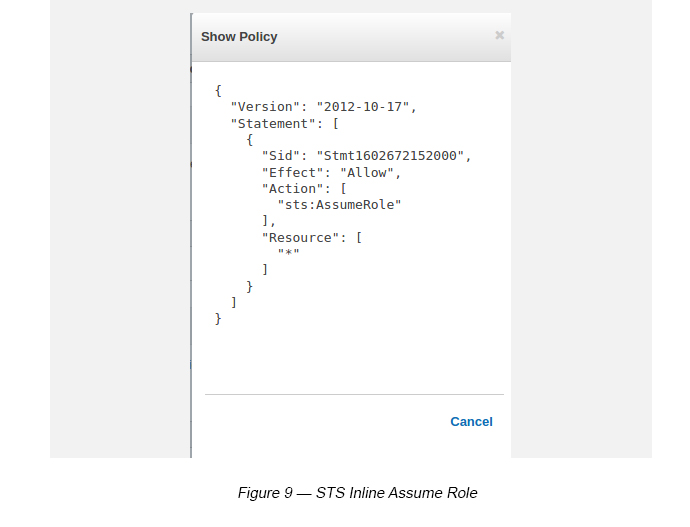
Click Show Policy under Inline Policy and you will see this in JSON format (see Figure 9).
Step 3 — Attach the above created group to the user demo1, which was created in step 1.
Step 4 — Do an Admin Role switch to the DEMO Member Account now in order to create an IAM Role.
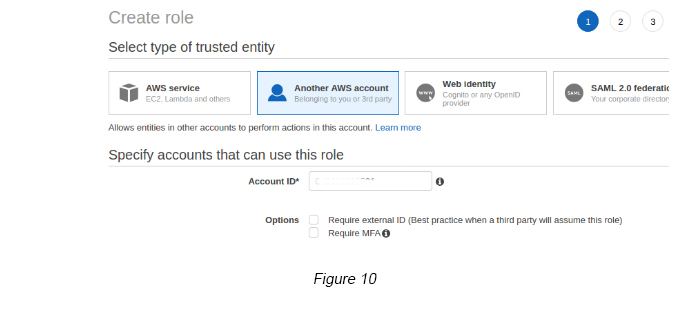
Step 5 — Go to IAM -> Roles -> Create Role ->Select Another AWS Account tab -> Enter the Account ID of the Master Account (From the AWS Account that you are doing the Role Switching) (see Figure 10).
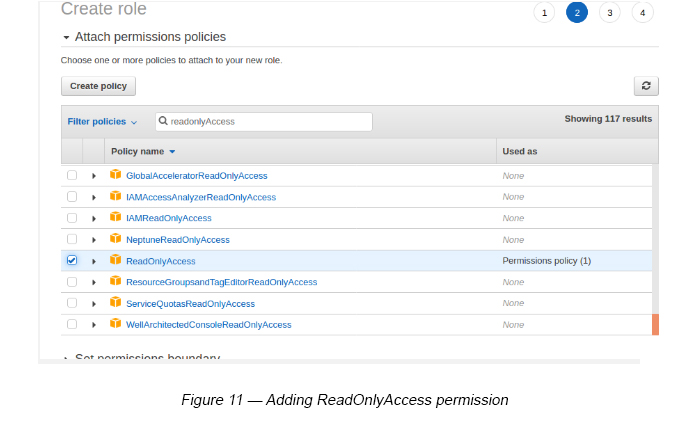
Step 6 — Add permissions by clicking the Next Permissions button and add the ReadOnlyAccess permission (see Figure 11).
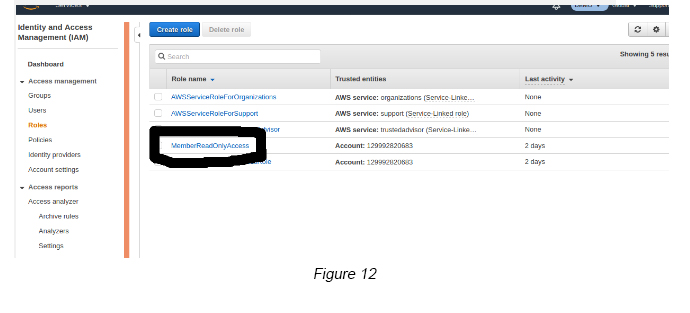
Step 7 — Enter a valid Role name (MemberReadOnlyAccess) and create the IAM Role (see Figure 12).
Step 8 — From the IAM Roles dashboard, select the newly created IAM Role under step 7.
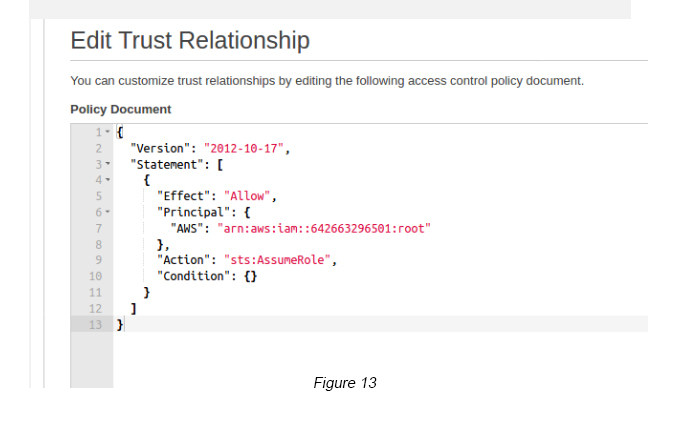
Step 9 — Click the Trust Relationship tab -> Click the Edit Trust Relationship tab. You will see a JSON policy like below (see Figure 13).
Step 10 — In order to restrict this Trust Relationship only to demo1 IAM User, you need to change the AWS principle of the above JSON Trust policy. After changing the IAM user ARN, it will be visualized like below (see Figure 14).

Step 11 — If you have managed to complete all of the above steps without any issues, then you are set to experiment a bit further now.
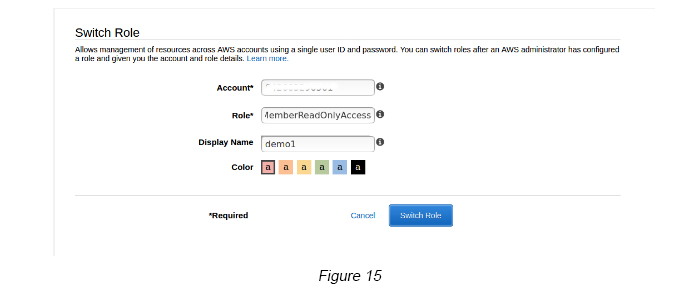
Step 12 — Use the Switch Role feature and now try and switch back to the IAM member account (DEMO). Use the Member Account ID and the Role (MemberReadOnlyAcces) as the one that you created under step 7 (see Figure 15).
Step 13 — If everything went to plan, you should now see the new Member Account AWS console with ReadOnlyAccess.
Congratulations!
Conclusion
Role switching among AWS accounts is a very strong feature provided by AWS in order to govern multiple AWS accounts within an organization. It is simply a matter of creating an IAM Role with a Trust relationship with an IAM user (with a policy with an STS Assume Role) in another AWS account.
References
- How to use Service Control Policies: https://aws.amazon.com/blogs/security/how-to-use-service-control-policies-in-aws-organizations/

Crishantha Nanayakkara
Vice President - TechnologyDeveloping a Custom Audit Trail and a Notification Service for a Workflow Based Serverless Application on AWS
READ ARTICLE
Human Emotions Recognition through Facial Expressions and Sentiment Analysis for Emotionally Aware Deep Learning Models
READ ARTICLE