EBS Volume Resizing
AWS EBS (Elastic Block Storage) is a network drive that you can easily attach to your EC2 instances. You can attach more than one EBS volume to an EC2 instance and you can even resize any of these attached volumes without a downtime of the EC2 instance.
This blog post will explain the important steps that you need to follow when you are doing a volume resize. You may find a few blog posts related to this topic, but there is no blog which explains all possible scenarios.
Steps
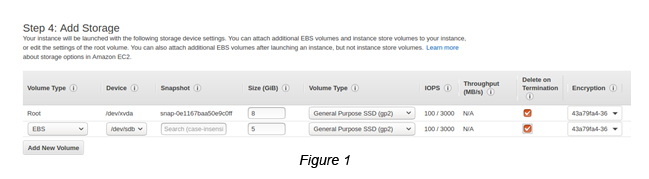
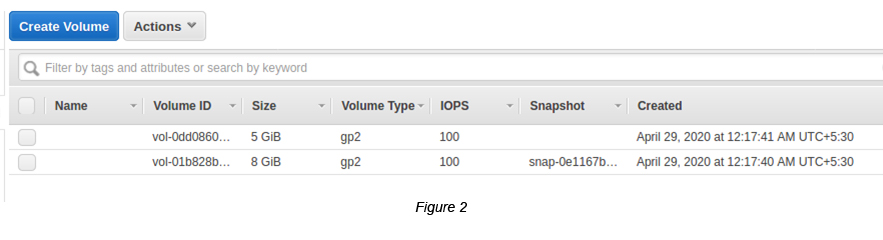
Step 01 : Create an EC2 instance (t2.micro) with two EBS (GP2) volumes (the ROOT volume and a Data volume).
The ROOT volume is 8 GB and Data Volume is 5 GB respectively (see Figures 1 and 2).
Step 02: Check available block devices in the instance (see Figure 3).
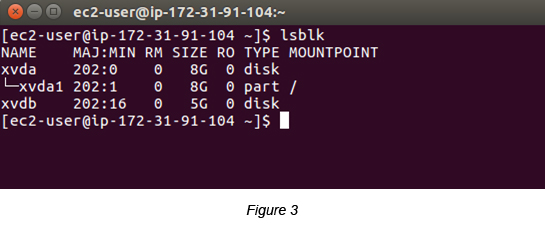
If you analyze the above carefully, you can see that there are two EBS disk volumes (xvda and xvdb) created. The first volume (xvda) has a disk partition created already but the second volume (xvdb) does not.
P.Note: If you want to get the status of the current disk partitioning, you can execute fdisk -l command (see Figure 4).
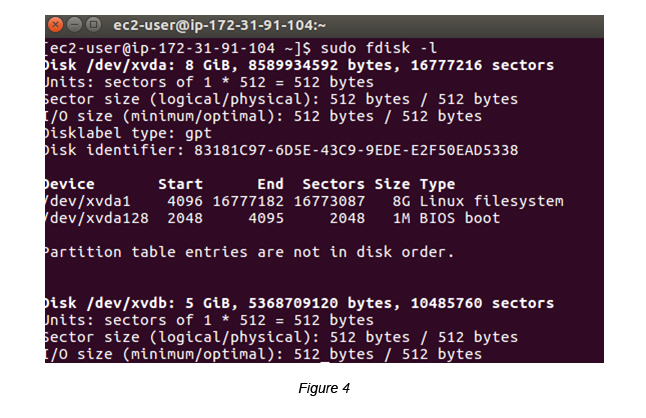
Though we can store and retrieve data without partitioning the xvdb volume, it is essential to have a partition table created when you are trying to resize the volume in the future. So lets create a partition table for xvdb to initiate this process.
The above could be further validated by executing the file -s command (see Figure 5). The xvdb volume is shown as an empty volume (/dev/svdb: data) here.

Step 03: Create a disk partition table in the Data volume.
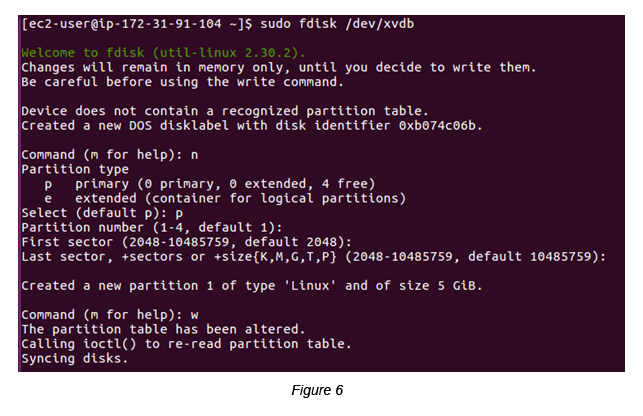
Make sure to enter “n”, “p” and “w” at respective places in order to create a default partition. You may ignore Partition Number, First Sector and Last Sector fields by just pressing the ENTER key.
Once you create the partition table, you are required to update the Kernel by entering the partprobe command.

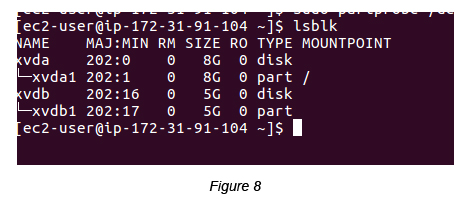
In the meantime, if you check available block devices using lsblk command, you will see both volumes (xvda and xvdb) and their partitions (xvda1 and xvdb1). That means that both volumes have their partitions created.
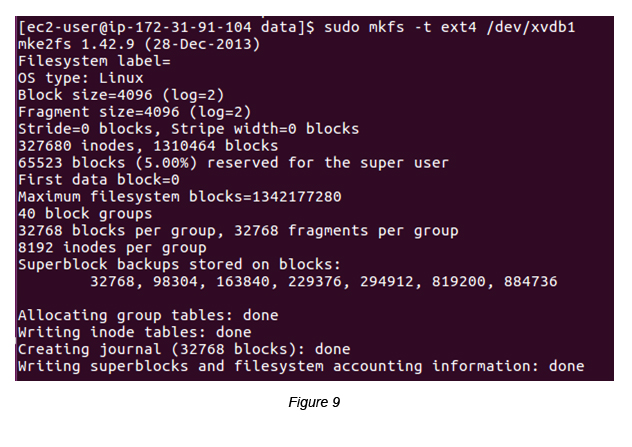
Step 04 : Format the Data volume partition (xvdb1).
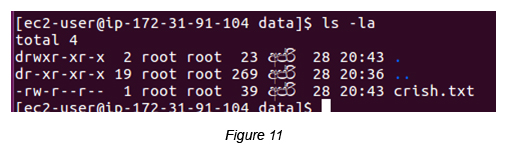
Step 05 : Create a mount point (/data folder) in the ROOT volume.
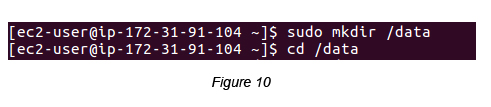
Then create some file(s) in the /data folder.
Step 06 : Mount the Data volume partition to the EC2 instance now.
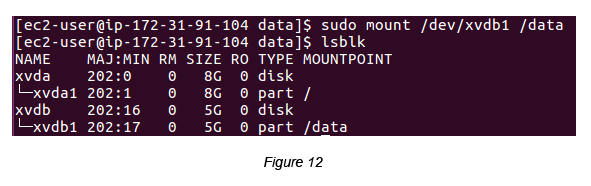
When you execute the lsblk command, you will see that the xvdb1 partition is now mounted to the /data folder.
Step 07 : Update /etc/fstab to automate the mounting process while restarting the EC2 instance.
$ sudo /etc/fstab
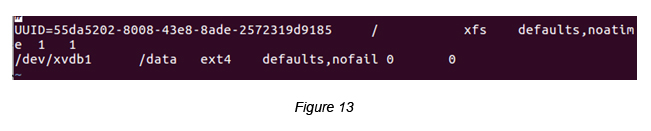
Step 08: Validate the /etc/fstab entry by executing the following.
$ sudo mount -a
If you wish, you can do a restart of the EC2 instance and see that both volumes are mounted properly.
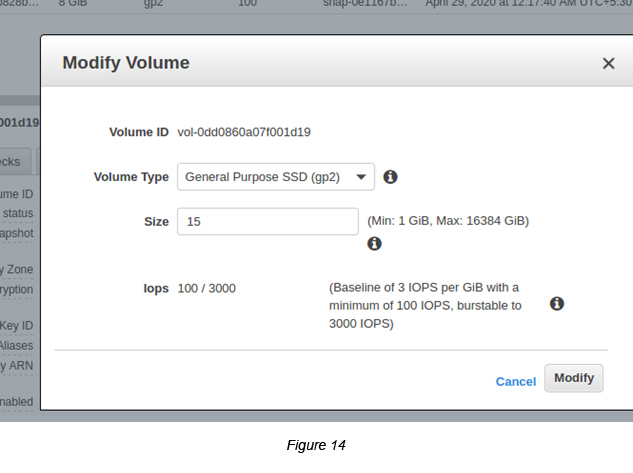
Step 09 : Let’s resize one of the EBS volumes now.
We have selected the EBS Data volume in this example and its volume size is increased from 5GB to 15GB (see Figure 14).
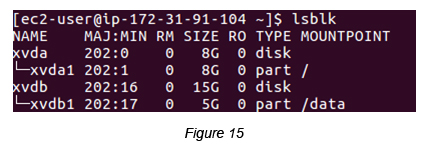
Once you do the resizing, run the lsblk command again to see the current volume block allocation. You should be able to clearly see that the xvdb1 partition size has not changed.
Step 10 : Increase the Data volume partition size. You may use the growpart command as shown below.
growpart <EBS volume> <partition-number> (see Figure 16).

Now, once again let’s check the Volume block sizes using the lsblk command.
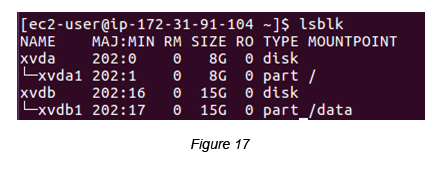
You can see that both the volume (xvdb) and its partition (xvdb1) are having the same size, which is 15GB.
However, resizing the partition does not mean that you have resized the file system as well. You can confirm this by executing the df -h command.

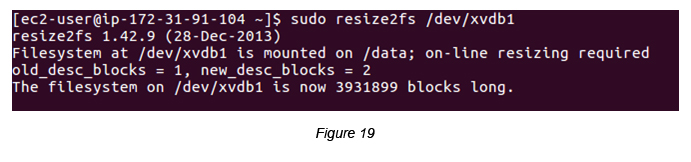
Step 11 : Resize the partition file system to 15GB. You can execute the resize2fs command as shown below.
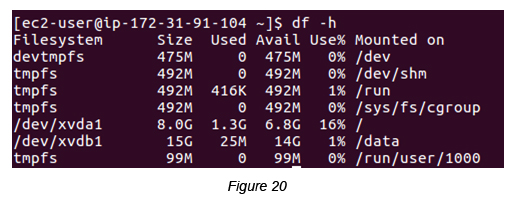
Now, you can recheck the Volume file systems using df -h. You will see that the data volume file system partition (xvdb1) has been increased to the maximum value, which is 15GB.
Congratulations! You have succeeded in resizing an EBS volume without a downtime.

Crishantha Nanayakkara
Vice President - TechnologyDeveloping a Custom Audit Trail and a Notification Service for a Workflow Based Serverless Application on AWS
READ ARTICLE
Human Emotions Recognition through Facial Expressions and Sentiment Analysis for Emotionally Aware Deep Learning Models
READ ARTICLE